Photography Tips
Here are some basic photography tips for those who are looking to get in to the hobby. I’m not going into great depth here, just some basic things you can use to your advantage.
1) Shutter speed
As a basic rule of thumb I use 1/800 for jets and 1/60 to 1/100 for propellor aircraft. I find 1/60 gives the best results with a nice round disc. I do find the colours at times getting a bit too white so I often limit the ISO to 200. Panning takes practice. I find as well after the off season that I’m very rusty and my results are quite poor. I suggest you start at 1/200 and work your way down slowly. End of the day all you need is one good shot, and you can take as many as you want! You can even practice on moving objects such as cars etc so you don’t have to go far afield to practice. If the scene is backlit I usually shoot faster as I find the results on the Sony better. But this is personal and a lot of it you can correct in post processing.
A bonus of shooting at slow shutter speed is that you can blur the background. Especially at airshows (looking at you RIAT!) there after often large eyesores like billboards which you can make less of a nuisance by panning. I usually try to hold my breath while I pan as it makes me move less and keeps it more steady. Keep your elbows tucked to your body as well. Try to focus on one point of the aircraft and move your upper body with the subject, not just your neck. Try to keep your body angled parallel to the aircraft so the movement is smooth.
If you’re shooting at low shutter speeds, do not forget to put your camera back into a “safe mode”. I always put my camera back at 1/1000 after shooting at say 1/60. Reason being is I don’t want to miss out on an unexpected shot which could happen at any time after your turn off your camera. Its good practice to put a safe shutter speed where you know you’ll get a sharp image, instead of leaving it at 1/60, get an unexpected opportunity and end up with a lot of blurry images.
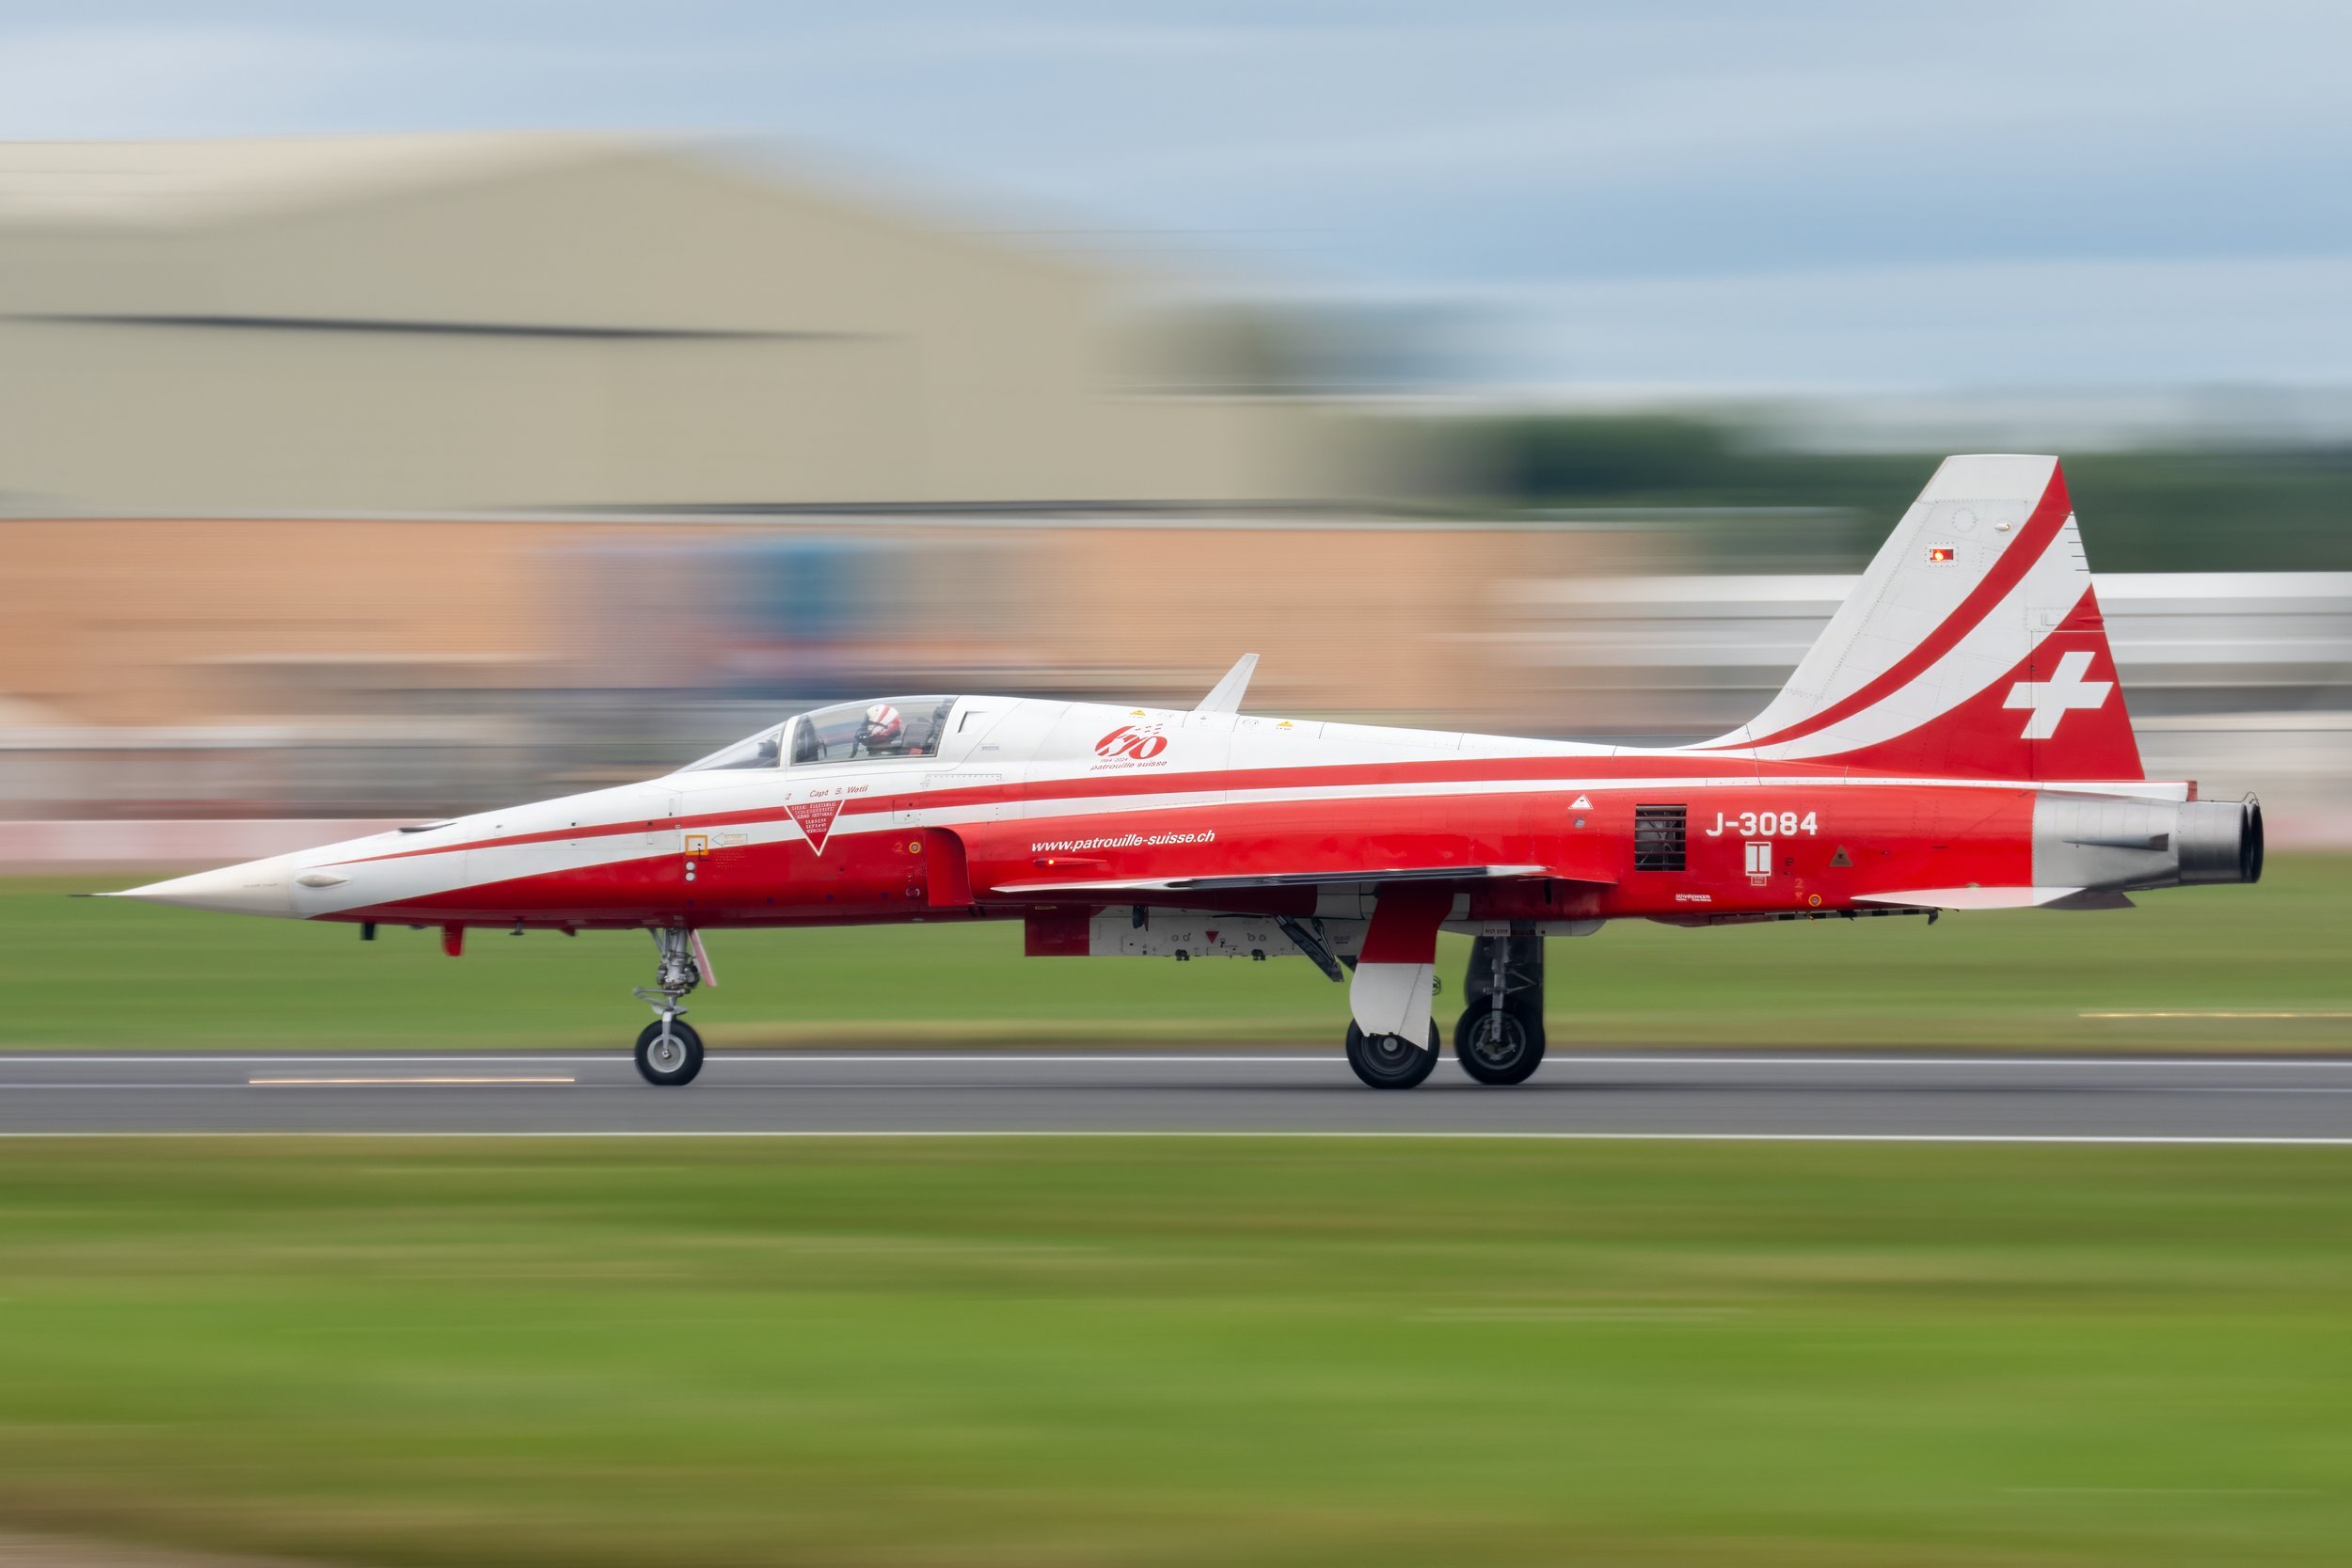
Get rid of cluttered backgrounds (partially) by using your panning. This is a Swiss F-5 from Patrouille Suisse landing in Fairford at 1/25 shutter speed. You can make do with 1/60 as well but the lower the more dramatic.
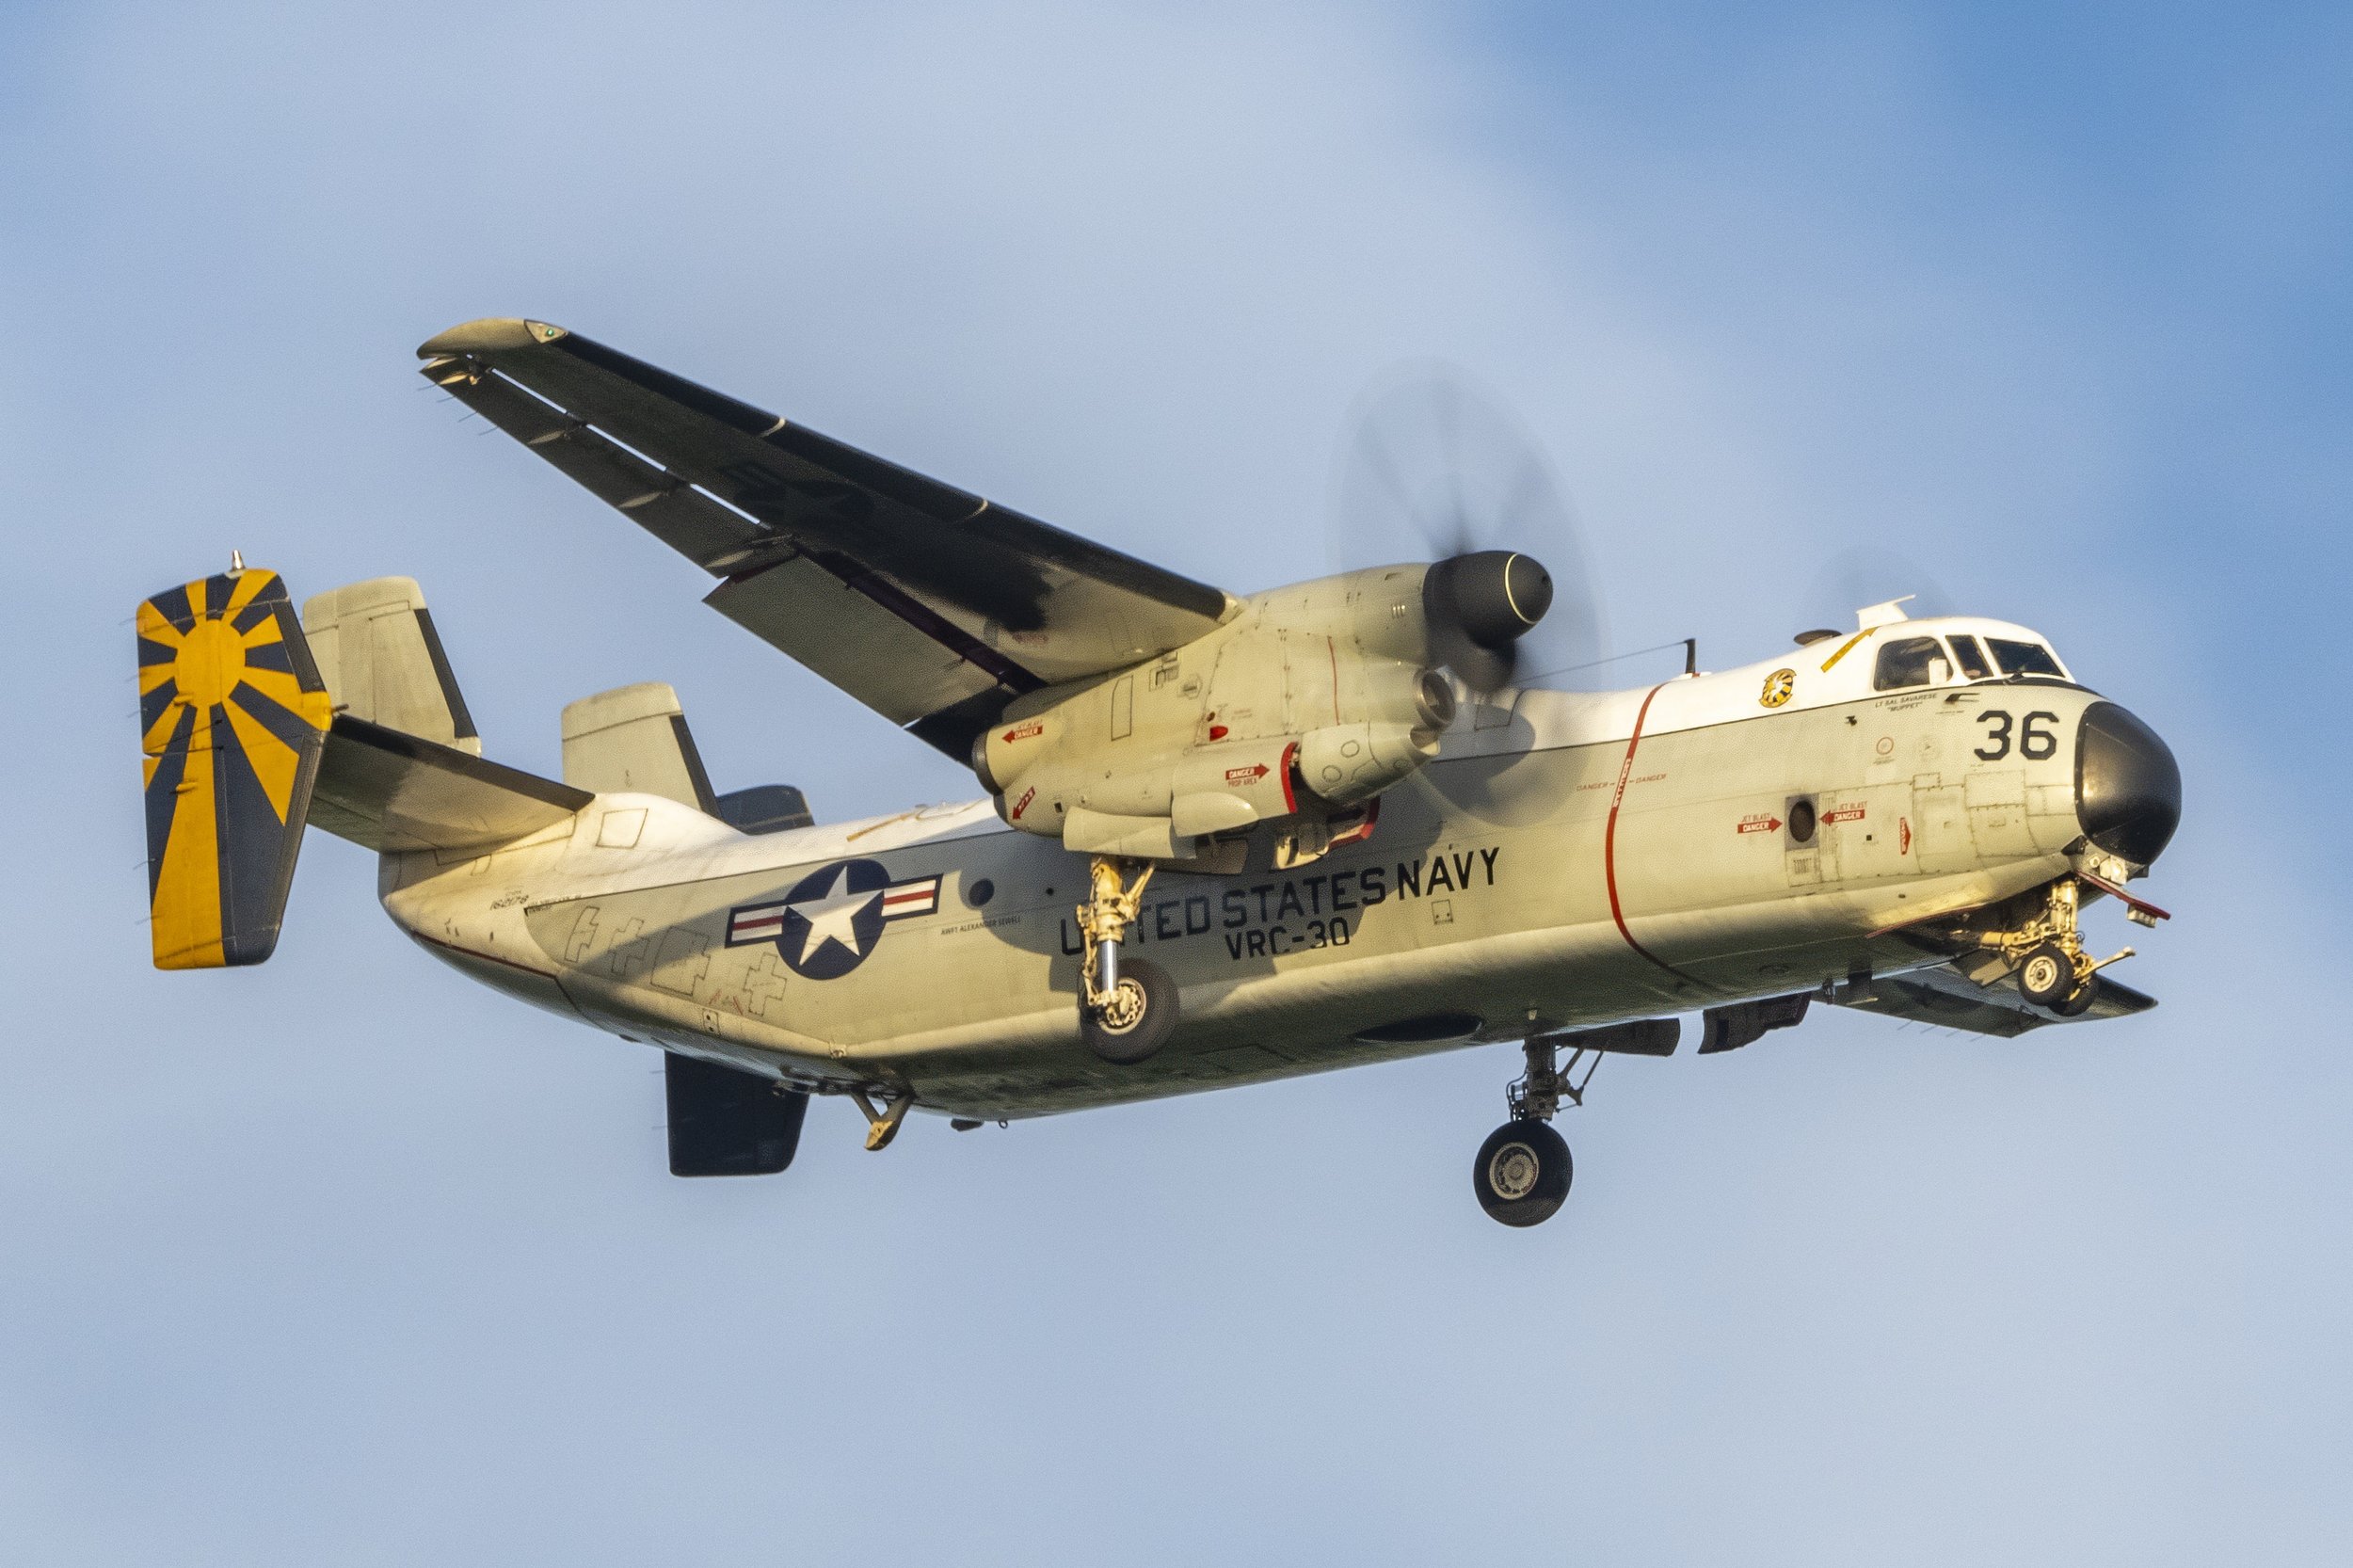
Shutter speed 1/60 gives you a nice full disc almost all the time, shown here on the US Navy carrier onboard delivery aircraft, the C2 Greyhound.
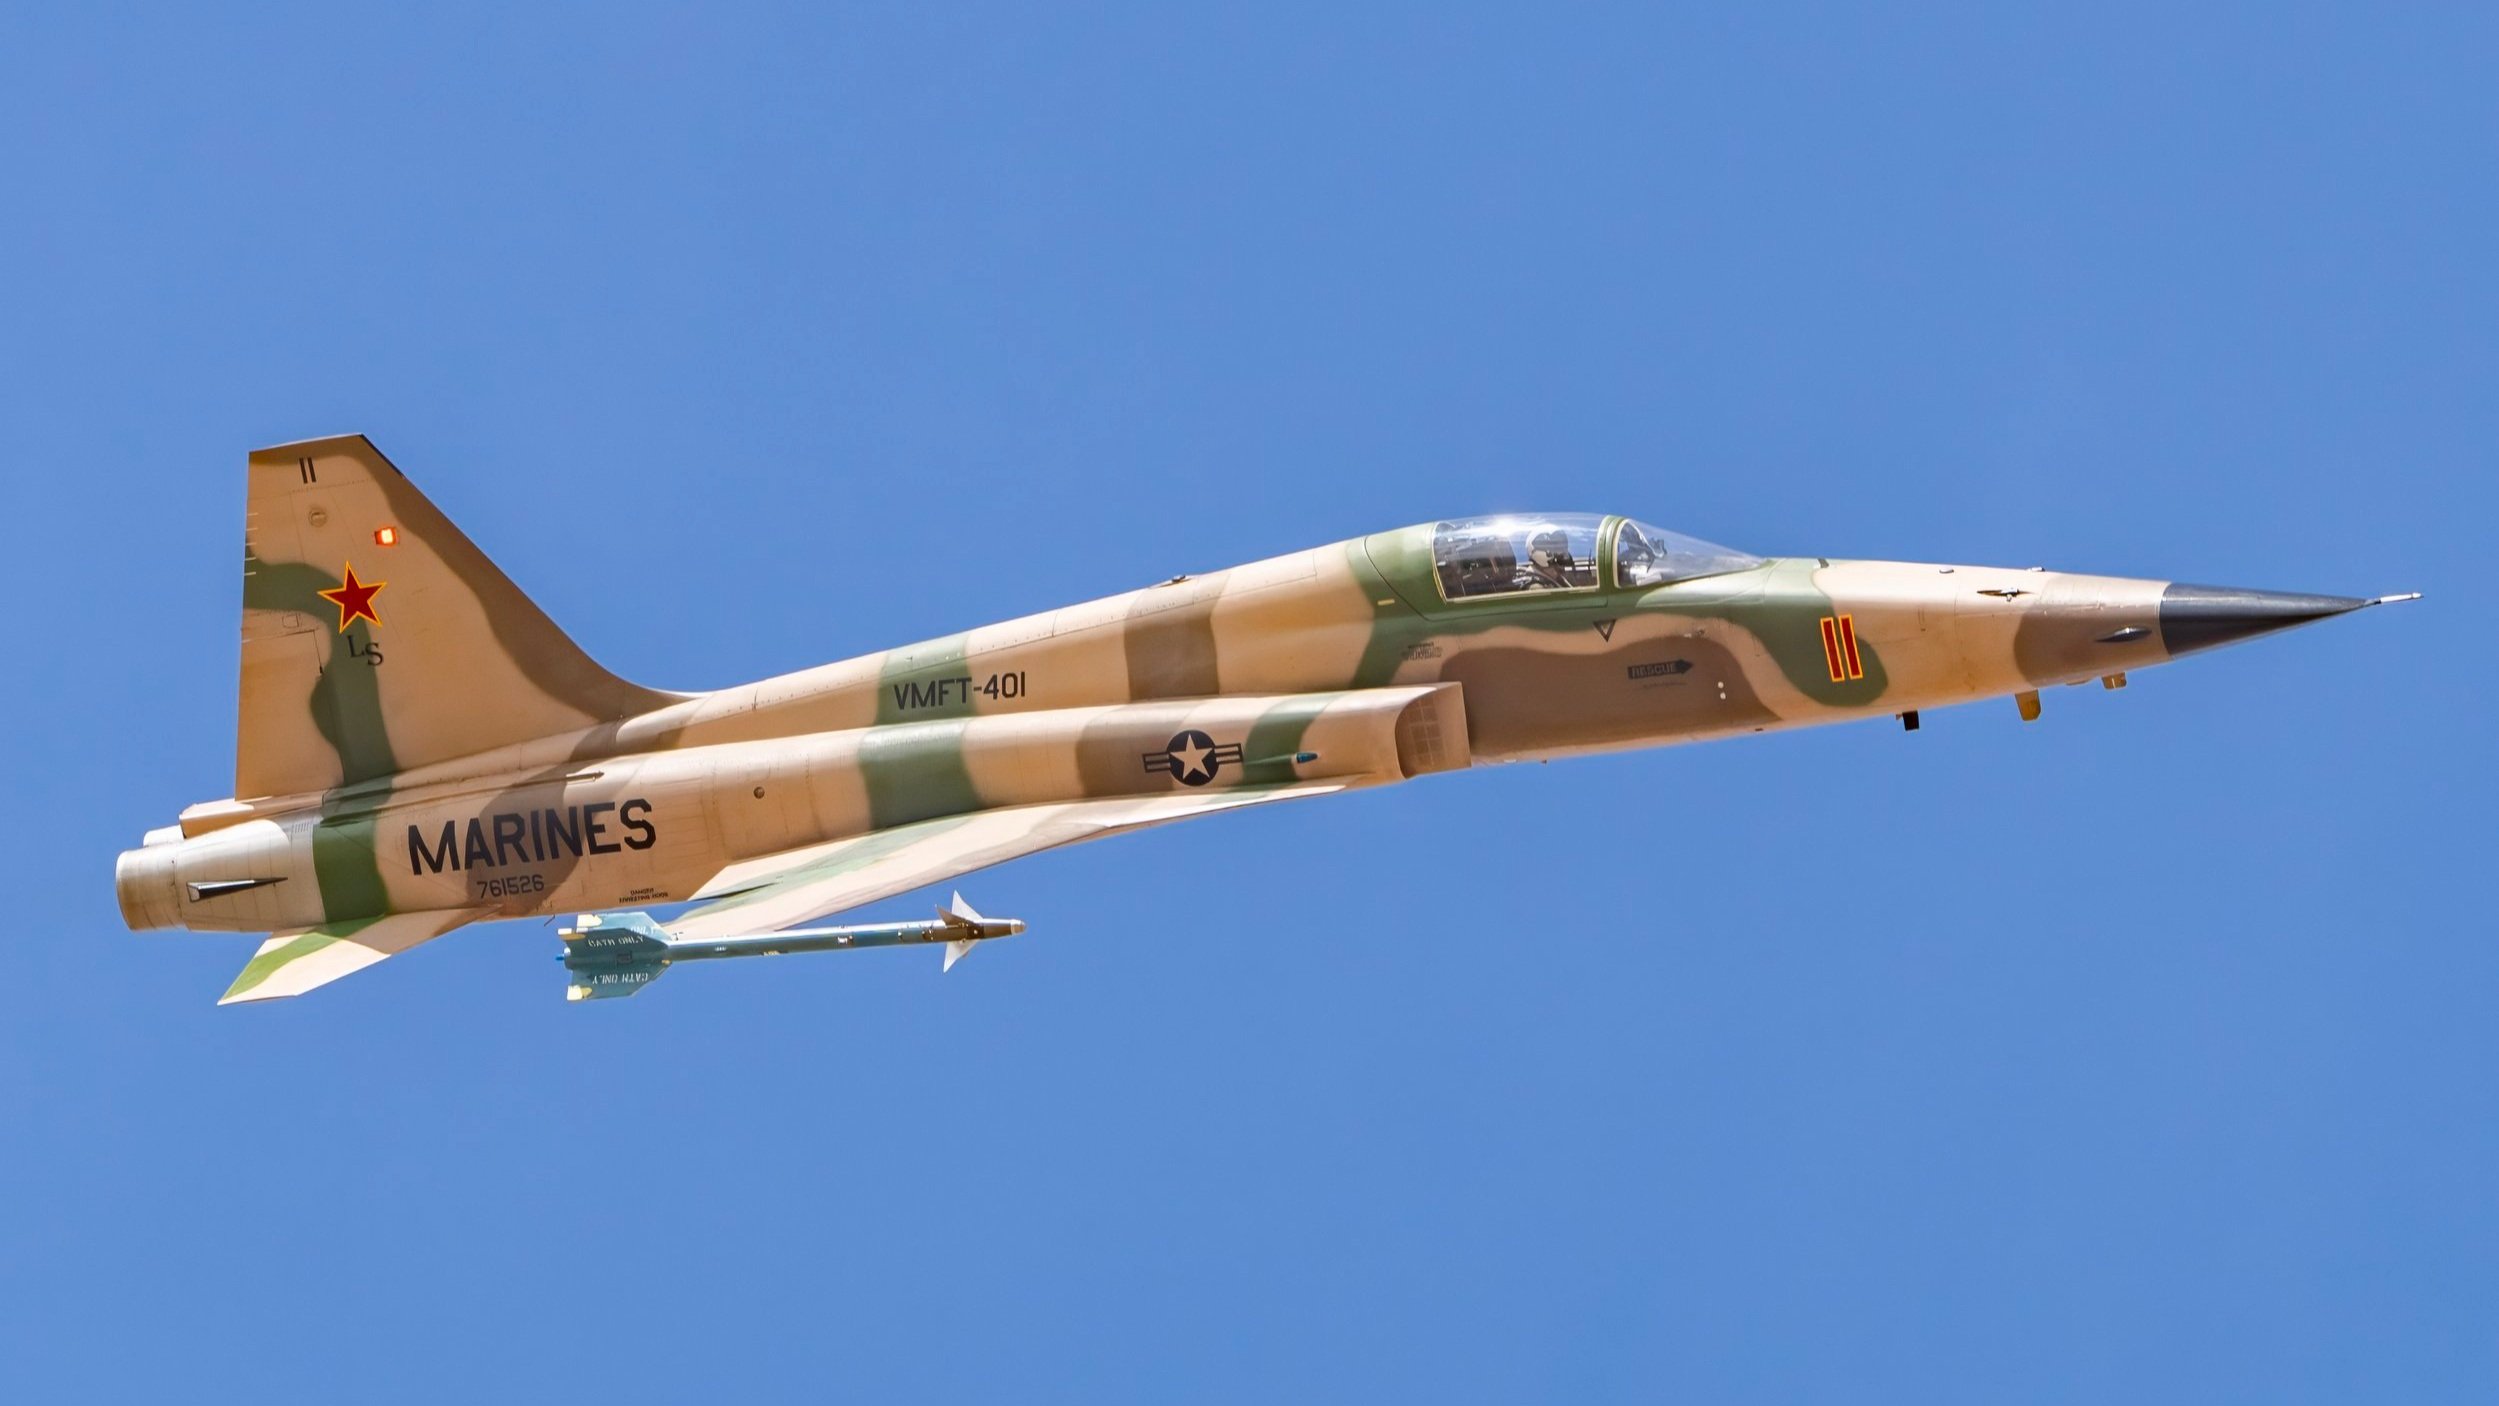
Shutter speed 1/800 gives you a lot of detail, like on this F-5 Tiger from the US Marine Corps taken in Yuma Arizona
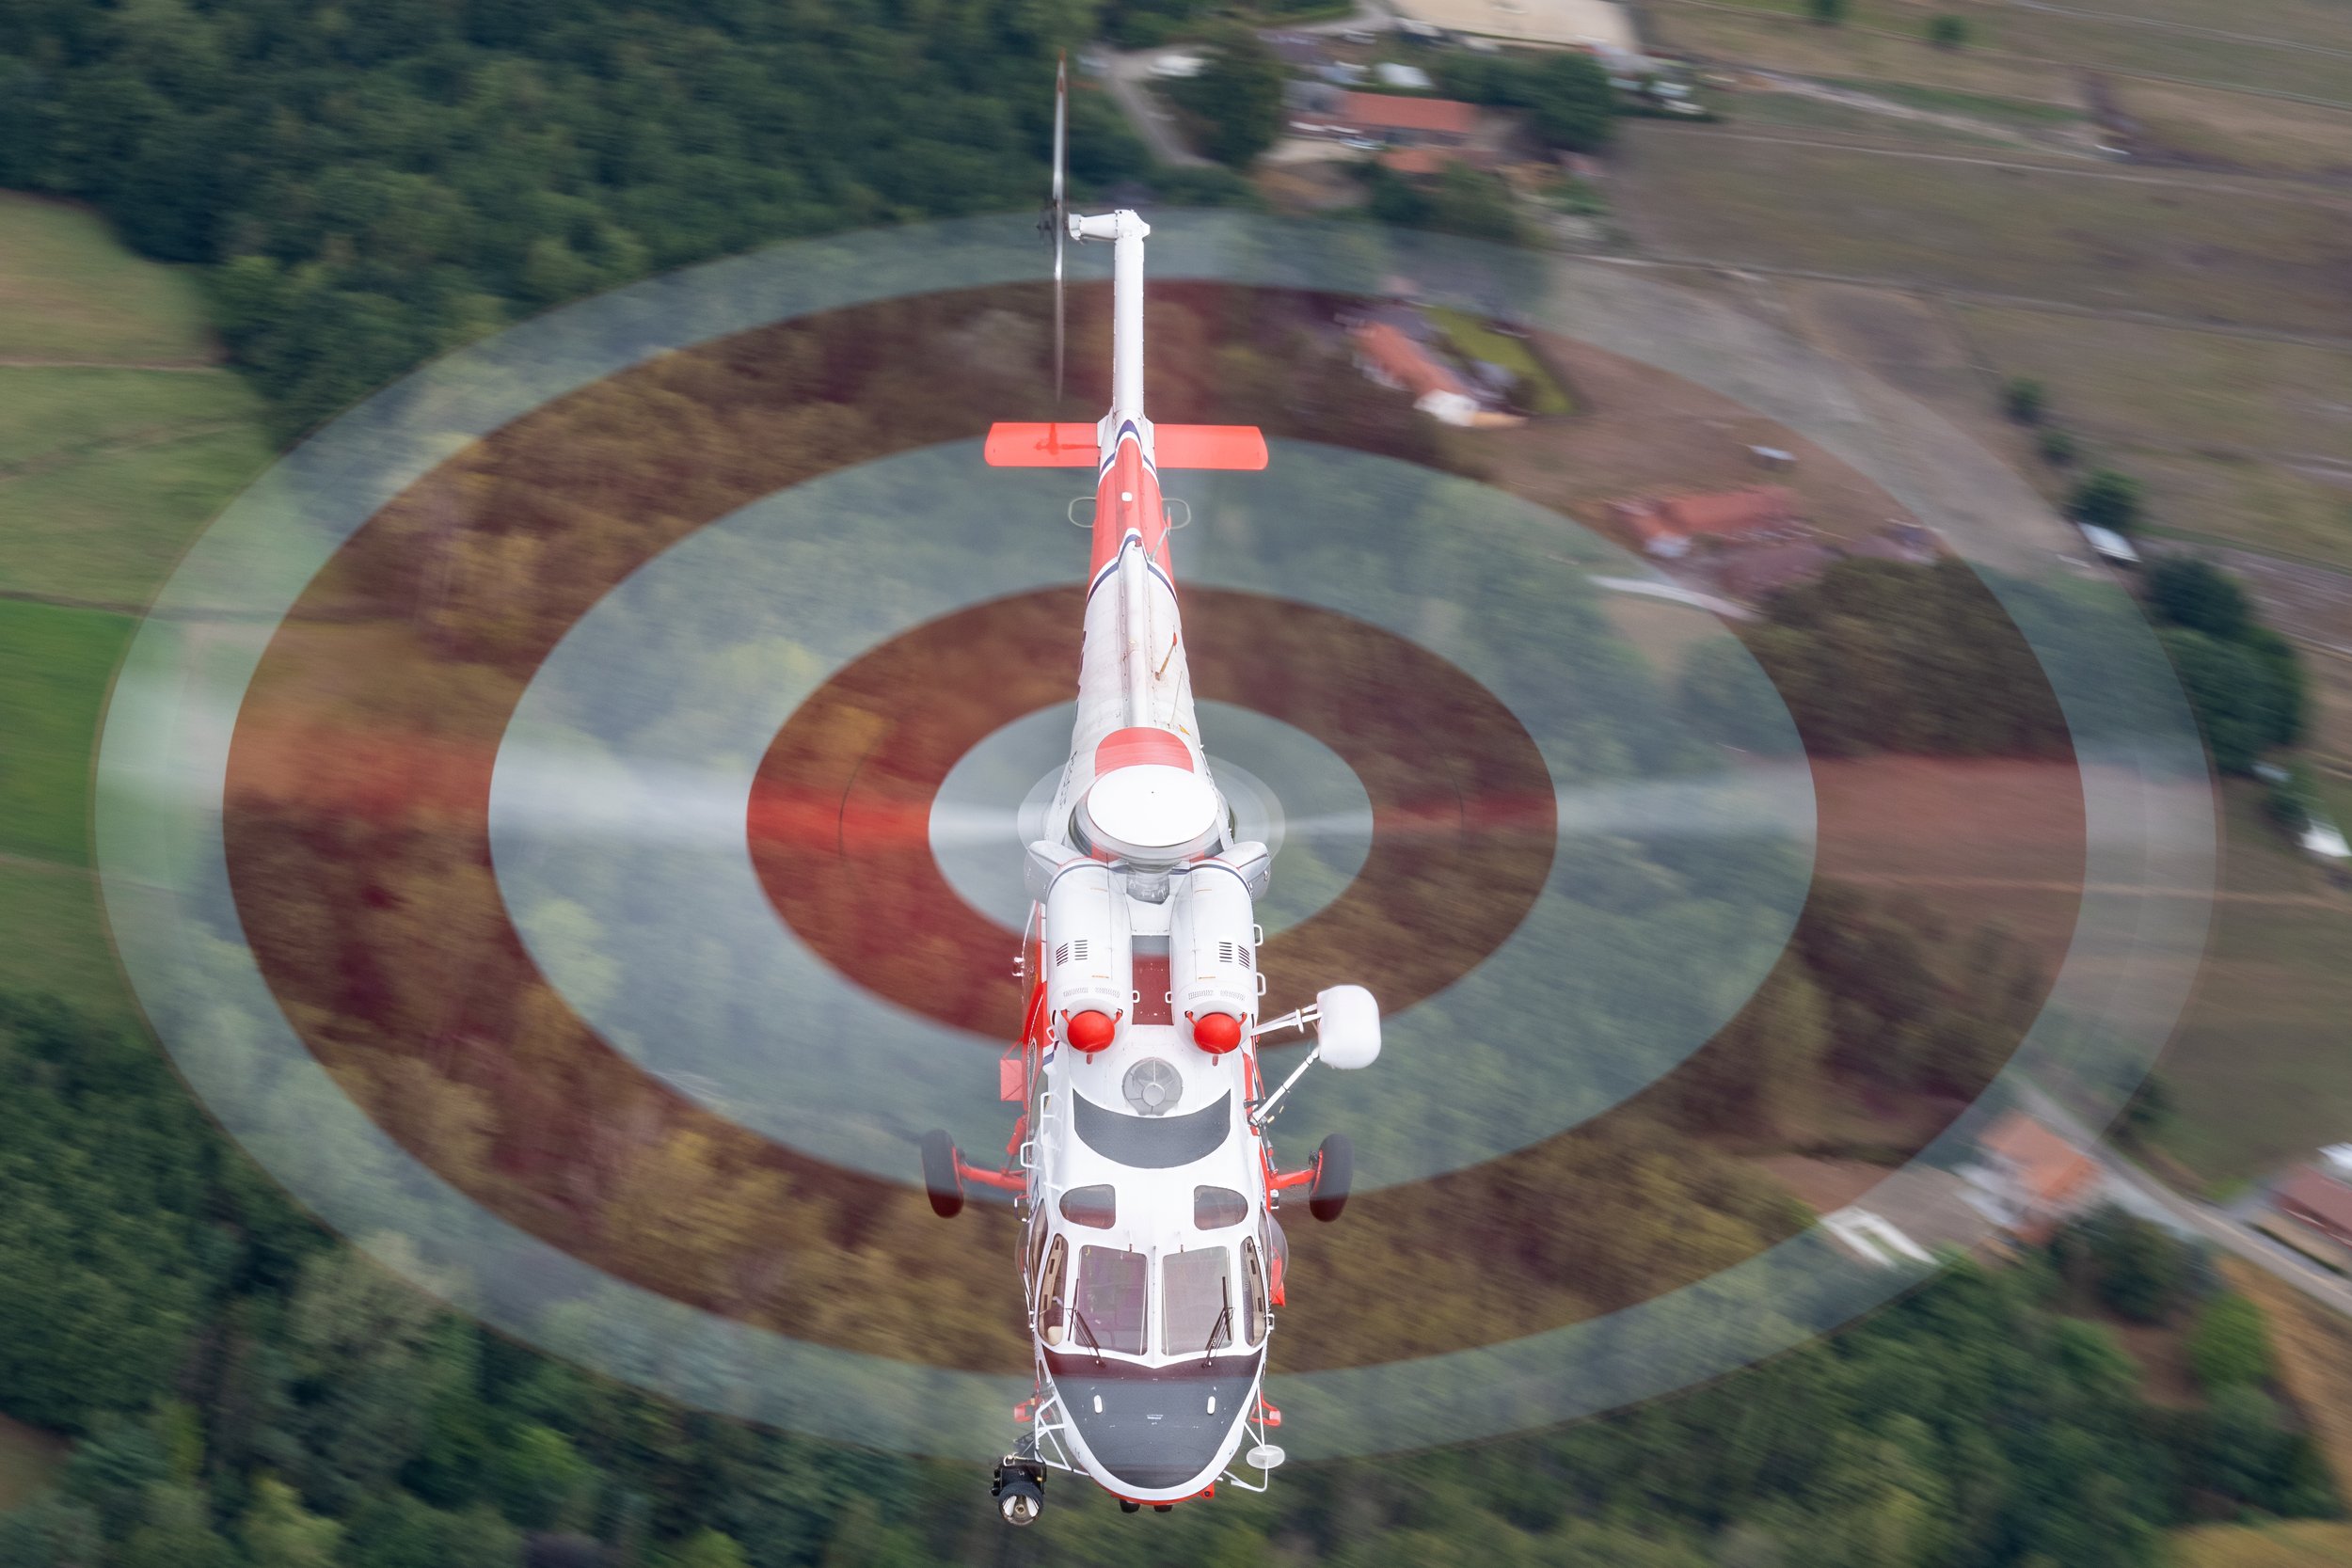
If you want to "go big or go home", you can shoot at 1/15 so you can get the full disc, like on this beautiful Czech Air Force W3 Sokol Search and Rescue helicopter. You’ll need a very steady platform for this.
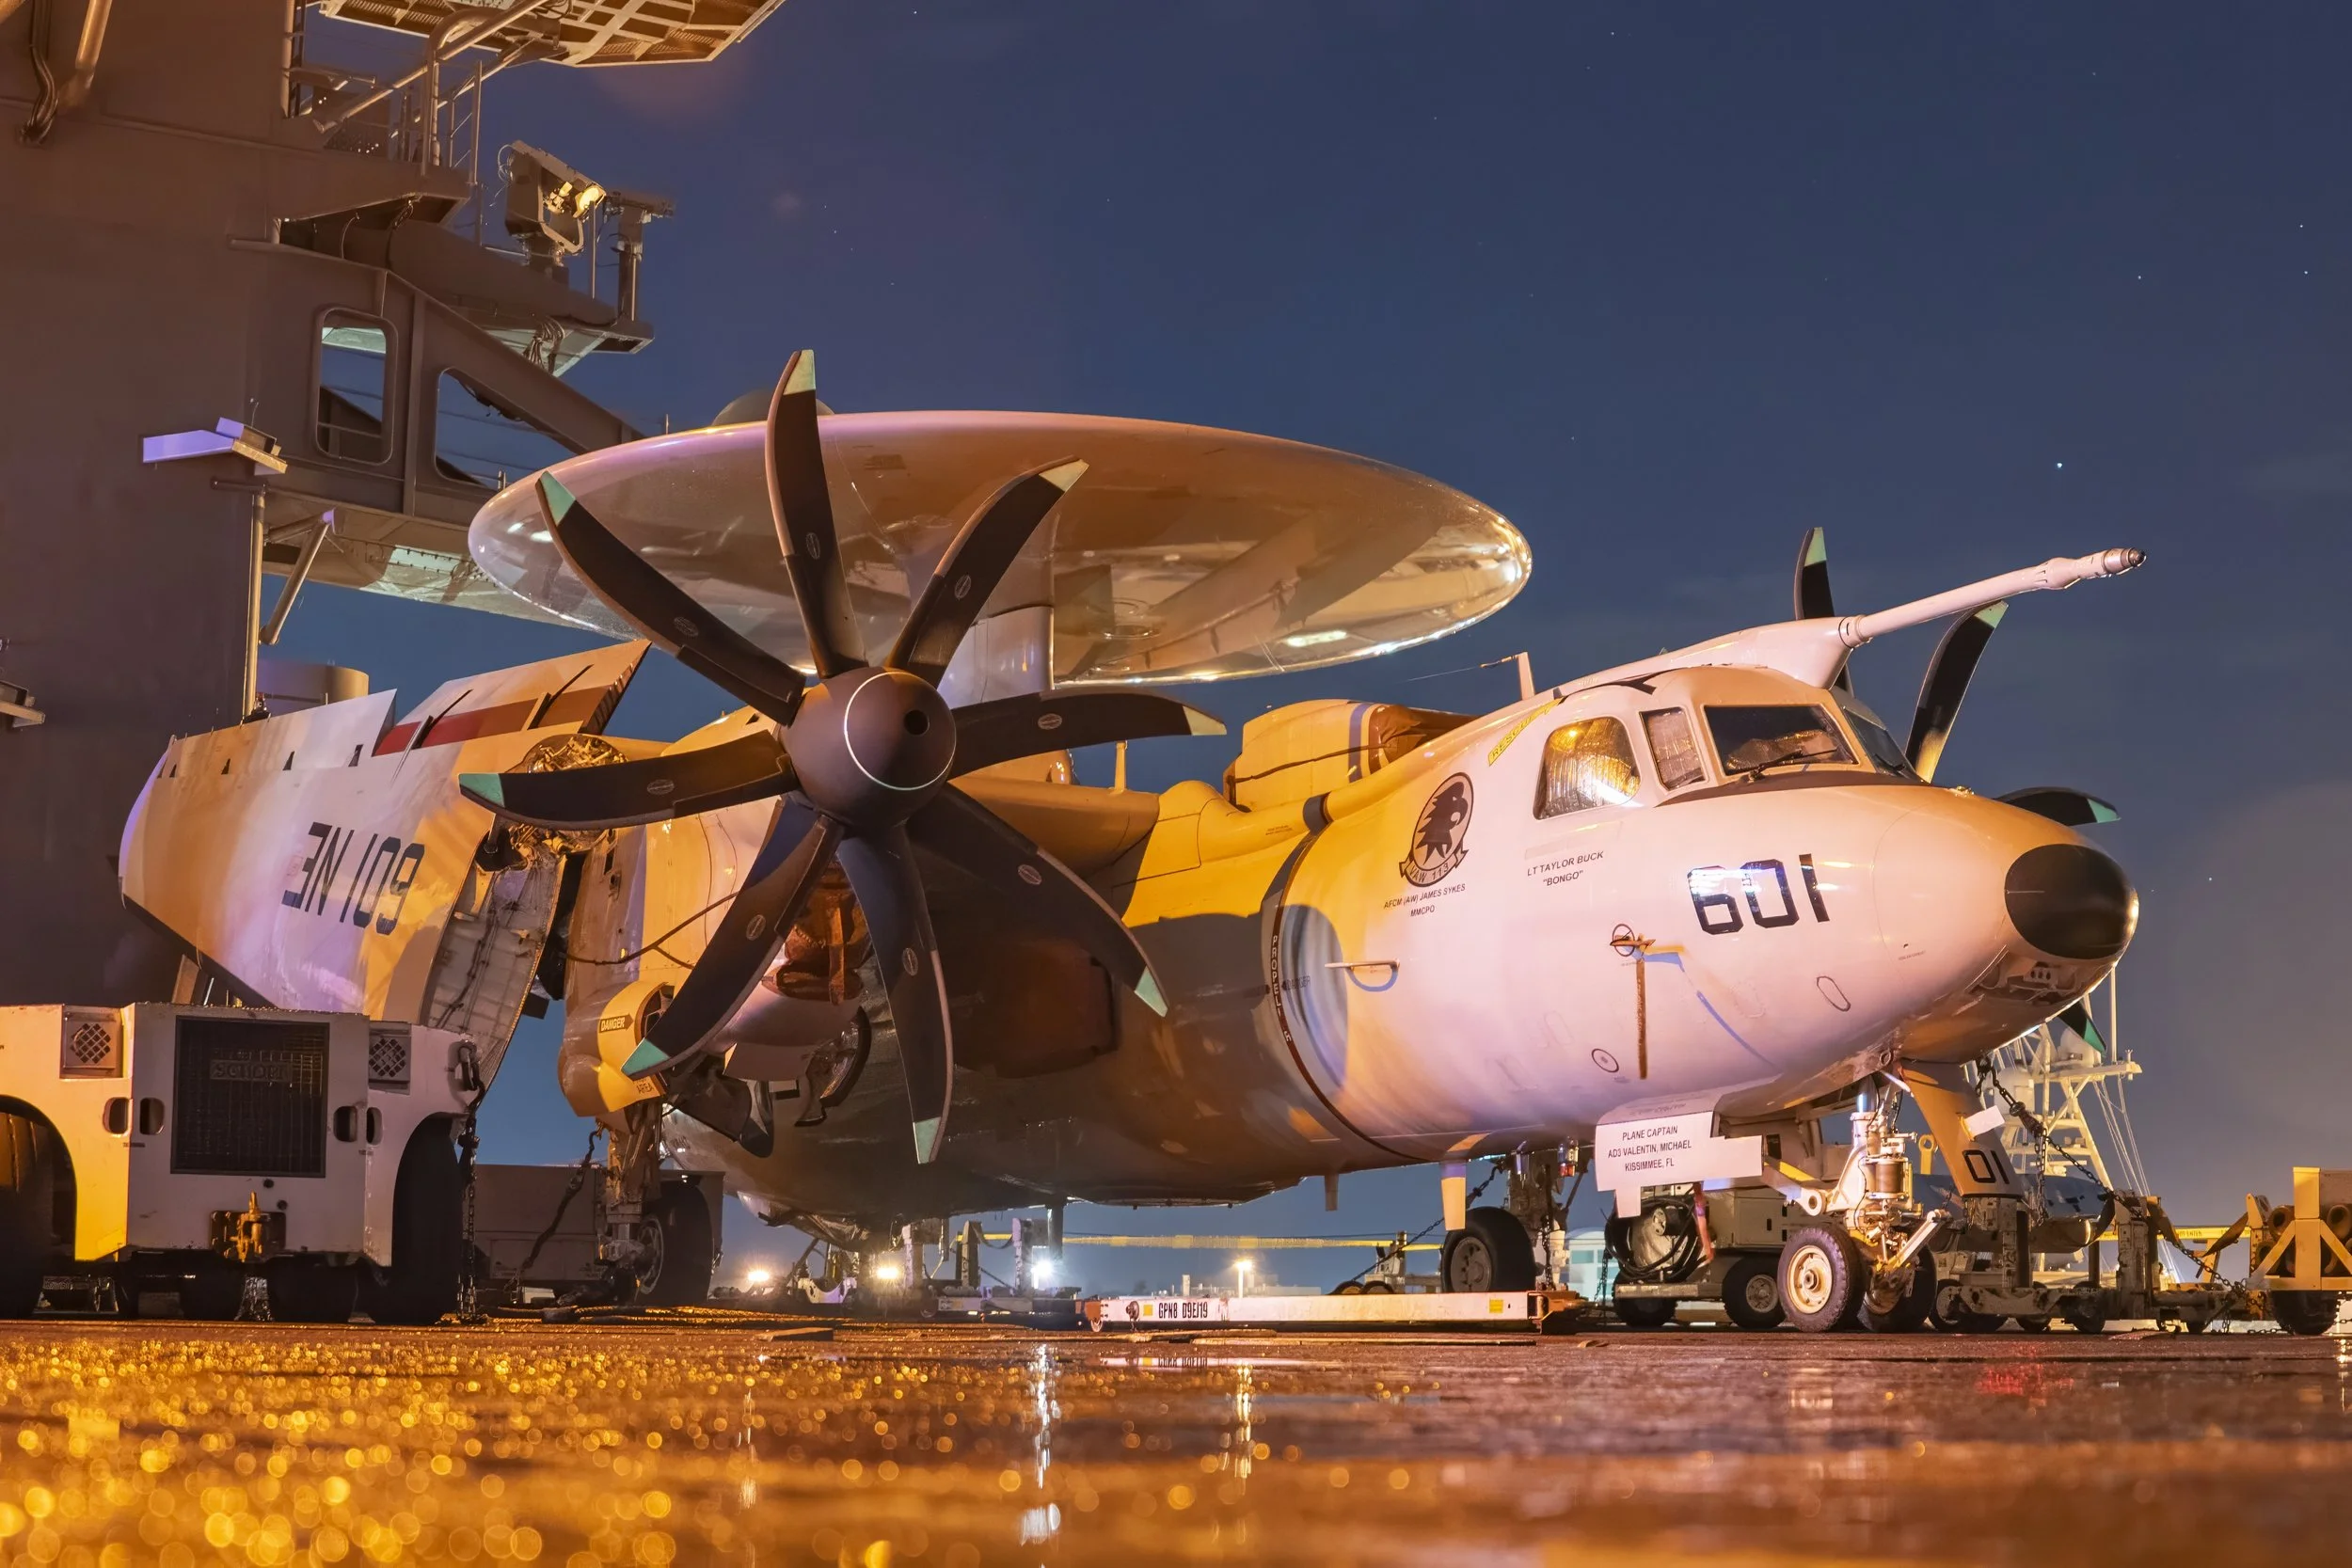
You can use several seconds exposure as long as you have a stable platform. To get dramatic night time shots if needed, such as this one on board the USS Carl Vinson aircraft carrier.
2) ISO
I use auto ISO for most of the jobs, as the light changes while you track a plane. The camera can adjust this much faster than I can, so let the camera do the legwork for you. I mostly use ISO 200 to 1000 for daytime. I never use ISO100 as it does not give me the dynamic range I want in my photos. Try shooting at minimum ISO200 during daytime. For early mornings or evenings, you should let your ISO go higher so you can capture more detail.
Don’t forget that a higher ISO is NOT the camera’s fault. If your ISO is very high, you’re either shooting at a too high shutter speed or not the right aperture. A higher ISO does not make your photo noisy, it just exposes the fact that the camera shutter speed and aperture are not correct for the conditions you are shooting at. Try lowering your shutter speed, you’ll see it will bring down the ISO, and try to open with your aperture wide open so you catch as much light as possible. Keep an eye on your ISO if you use the Auto settings. Don’t be worried about shooting at higher ISO, you rather have a properly exposed photo with some grain in it than a photo that’s either blurry as the shutter speed is too low, or very underexposed. Underexposed photos are very hard to fix in post processing. Removing noise using a program like Topaz is much easier, and at least you get to keep your shot.
Another tip to keep ISO in check is to NOT shoot at the maximum range of your zoom lens. At max range, the aperture will be at the maximum, meaning you are shooting at the capacity of that particular lens. It’s better to zoom out slightly and try to crop the photo in post processing. This will out more noise but your chances of a good exposure at a higher shutter speed is much better. Most zoom lenses don’t give the best results at the maximum focal length. I suggest you experiment with your gear, see what is the sweet spot for your lens and try to adapt to your gear.
3) Aperture
I shoot in shutter priority mode. One of the biggest myths is that real photographers shoot in Manual mode. I find manual mode handy when I’m shooting static, like a plane on the tarmac that’s not moving. You can get fantastic blurred backgrounds if you use manual mode. For shooting aircraft in the air, the light changes almost every second when you move your camera with the plane, especially on a cloudy day. I prefer to let the camera do the work, that why you pay such a hefty sum of money for an expensive camera body. It should do some of the work for you and react quicker than you can.
I find it more relaxing to shoot in shutter priority as well as I don’t have to work ISO, Aperture and Shutter all at the same time. The results are just as good, if not better. Aperture priority or manual is good for when you are shooting a static display and want to blur out the background. In the air I prefer to focus on freezing the aircraft in flight or having a full disc on a propellor aircraft. Depth of field here isn’t relevant as the sky will act as the backdrop.
4) Auto Focus
I always use tracking mode for my aircraft in flight. Sony has Zone mode and continuous auto focus which highlights what part of the aircraft is in focus. Use other modes for static aircraft as you can take your time taking a photo and get more of the aircraft in focus. Also you are much closer to the subject so you have time to adjust your settings.
Some cameras do not have a lock button for the settings. So after you travel and before you shoot, always do a quick check of your settings so ensure nothing has changed during travel. I also find setting up a private menu very handy as some settings I change regularly, whereas others I never touch. Not all cameras have this but if you have it, use it. Saves a lot of time when you’re on the road and need to change something quickly. For metering I usually use center weighted as my subject is the one I want to expose properly. The sky can be fixed later. Some cameras do a better job at this than others, so see what works for you.
5) RAW or JPEG
Now this really depends on what kind of photographer you are. If you work on a smaller budget and don’t have a lot of memory cards, you could opt to shoot on JPEG. These are usually just a quarter of the size of a raw file and are processed in camera. Meaning they look nicer straight off the bat. If you want to post something on Instagram quickly, shooting JPEG is a good option for you as you can post something quickly without having to use Lightroom or any other software.
Also, you can store them on your phone camera roll if you want to look back at them. You can fit a large number of JPEG on one memory card as well, meaning you can do with just a few cards on a trip. Also they take up a lot less disc space, meaning that you don’t have to buy expansive and expensive Cloud storages and SSD or HDD drives. I personally use RAW (compressed) as I store all my photos in Lightroom. I use the Cloud version as well as the Classic one. I never delete any photos from my camera cards until all photos I want are safely stored on the cloud and my hard drive. So I have a dozen or so memory cards that I use. It’s mainly to ensure I don’t lose any photos until they’re on the Cloud.
After this I’ll review them when I come home and edit the ones that I like. I don’t save JPEG or TIFF files on my computer as it takes up too much space. I like using Lightroom as it remembers the adjustments I have made, but you never lose the original file. When I want to print a photo I’ll change it to TIFF as its better quality than JPEG. I shoot at 3x2 format, but some people have other preferences. If you don’t want all the hassle, JPEG works just fine. And if your camera has two card slots, you can even shoot RAW in one and JPEG in the other. Best of both worlds!
6) Tele convertors
This is potentially a lengthy discussion with any spotter. As a rule of thumb I try to stick to a 1.4x TC but only if the weather conditions allow it. You’ll lose a full stop if you have a TC (at least!), and if it’s late in the day or early morning I usually try to avoid using one. I would definitely not use one with my zoom lenses as this will really affect auto focusing and picture quality. If you have a wide range zoom lens, say a 100-500, I would avoid using it as the auto focusing will slow down considerably, especially if you use non-native lenses. On a prime lens, stick with a native TC as these are designed to work in sync with the lens. Most TC’s will have a list of suitable lenses listed on the website or package, so do check this before you buy. If you use a crop sensor camera the image quality is further reduced. So I would recommend not using a TC with a crop sensor at all. They may appear lightweight but if you add the TC it does add weight to your setup, so you might want to use a tripod in order to support the weight. Overall, if you can avoid it, try to not use the TC.

